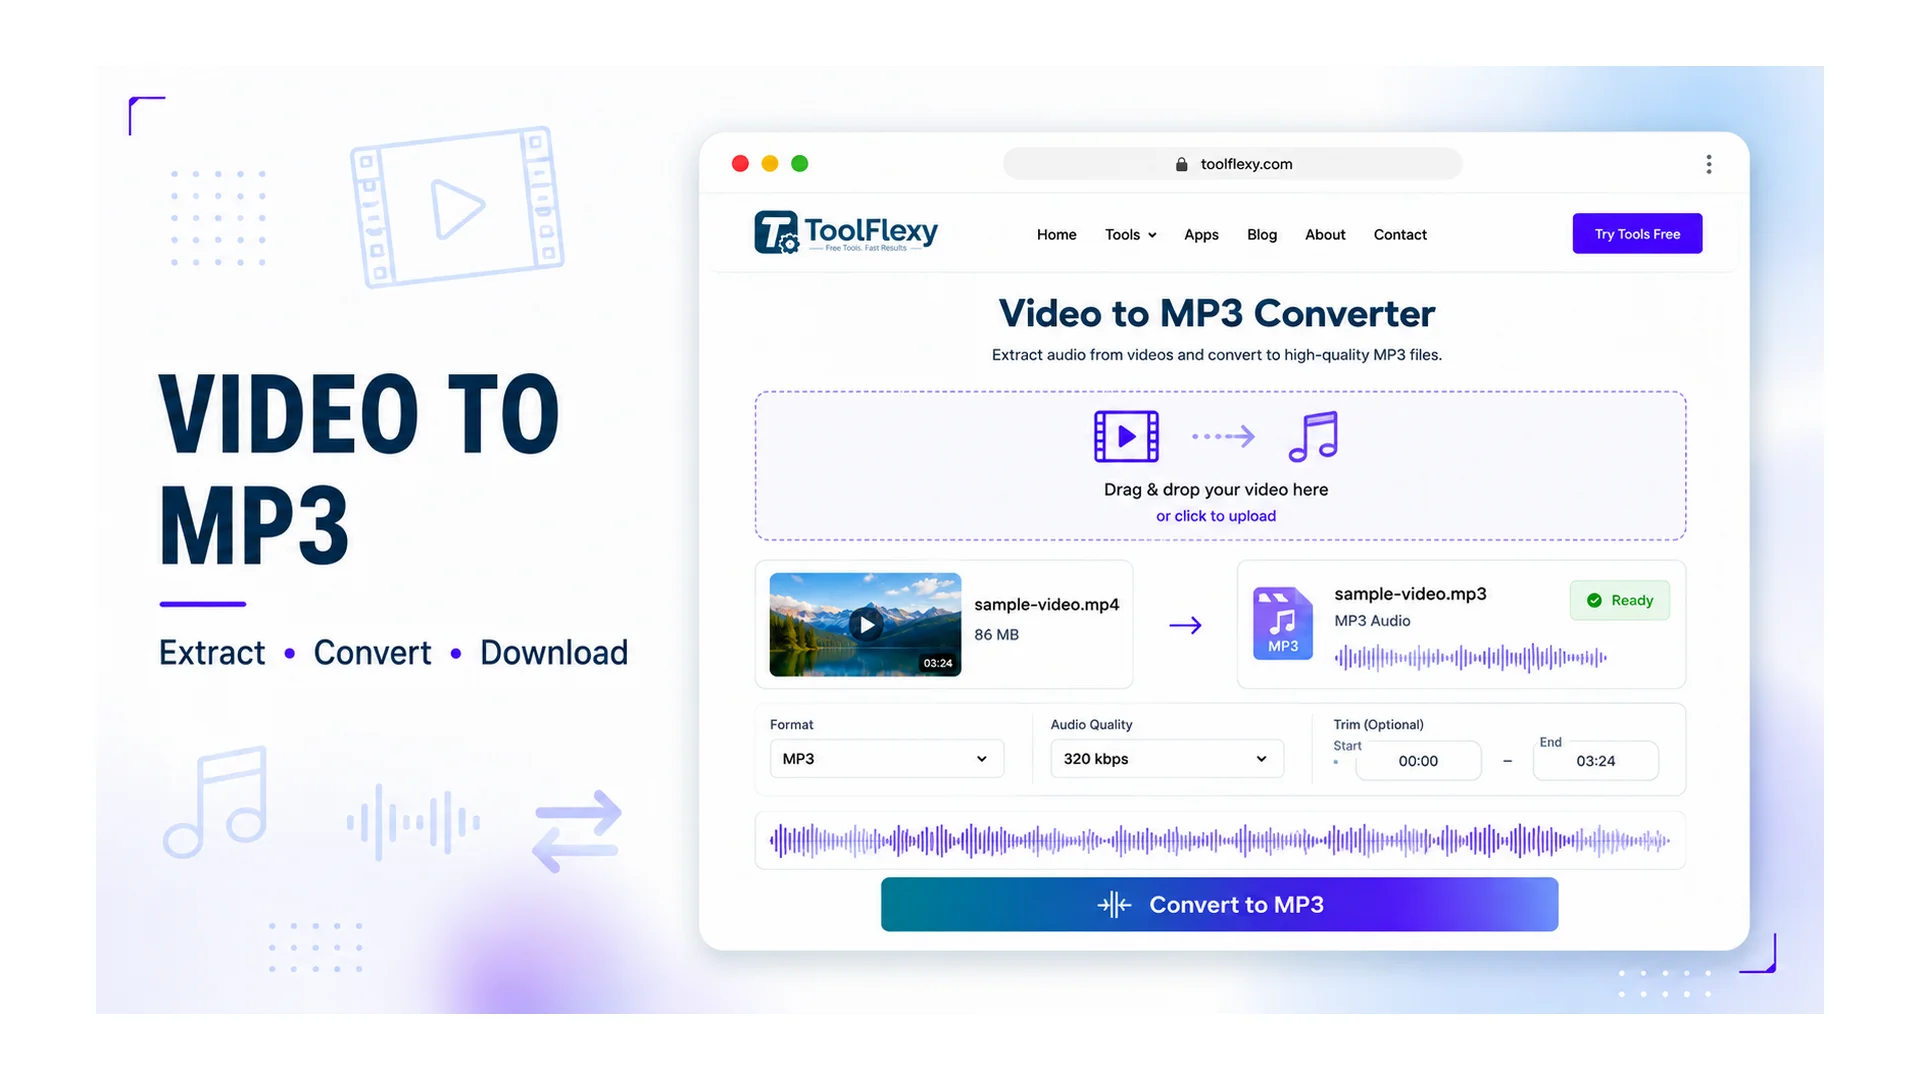
A 200MB video file is overkill when all you actually need is the audio track — a podcast clip, a voiceover, a piece of background music. ToolFlexy’s free tool pulls the real audio track out of an MP4, MOV, or WEBM file and converts it to MP3 at your choice of bitrate, without re-encoding the video or forcing you to open an editor.
How to Extract Audio From Video in 3 Steps
- Upload your video. MP4, MOV, and WEBM are all supported.
- Choose a bitrate. 128, 192, or 320 kbps, depending on what the audio will be used for.
- Convert and download. The MP3 is generated and ready to download, typically in well under a minute for a normal-length clip.
One thing worth knowing upfront: the conversion runs on ToolFlexy’s servers rather than purely in your browser, so staying on the page and keeping your connection active until the download is ready matters more here than on a tool that processes everything locally.
Which Bitrate Should You Actually Use?
Bitrate controls how much audio detail survives the compression, and the right choice depends entirely on what’s actually in the recording.
- 128 kbps — sufficient for spoken word: lectures, podcasts, interviews, voiceovers. Voice has a narrower frequency range than music, so lower bitrates rarely introduce audible artifacts here.
- 192 kbps — a safe everyday default when you’re not sure what the audio contains, or when it mixes speech and light background music.
- 320 kbps — the setting to use for music or anything where compression artifacts would actually be noticeable on close listening; it produces the largest file of the three but keeps meaningfully more detail.
Since the tool extracts the actual audio track rather than regenerating it from scratch, quality is determined almost entirely by the bitrate you pick — there’s no separate “quality slider” doing something different behind the scenes.
MP3 Isn’t the Only Audio Format — Here’s Why This Tool Uses It Anyway
MP3 is a lossy format, meaning some audio data is permanently discarded during compression to keep the file small — the tradeoff that makes it small enough to email, upload, or play on virtually any device without compatibility issues. WAV, by contrast, is uncompressed and preserves every bit of the original audio, which makes it the better choice for further editing but produces files that can be 10x larger or more for the same clip. AAC sits in between — lossy like MP3, but generally more efficient at a given bitrate, which is why it’s become the default for a lot of streaming and mobile playback.
For a one-time extraction meant to be listened to, shared, or used as a podcast clip, MP3’s universal compatibility and small file size make it the practical choice — which is exactly the case this tool is built for, rather than a professional audio-editing workflow.
If You’re Extracting Audio to Re-Edit It, Watch for Sync Drift
Audio and video can drift out of sync when a clip’s audio is separated and later recombined, and it’s rarely random — the two most common causes are a sample-rate mismatch between the extracted audio and your editing timeline, and a frame-rate inconsistency in the source video (29.97 fps vs. an assumed 30 fps is a classic culprit, since the drift compounds gradually rather than showing up immediately). If you’re planning to re-import the extracted audio into a video editor rather than just listening to it standalone, matching your timeline’s frame rate to the original footage and working at the standard 48 kHz sample rate for video audio avoids most of this entirely.
Extract Audio From Video Online vs. Using a Desktop Video Editor
A desktop video editor (Premiere, DaVinci Resolve, iMovie) can extract audio too, but it means opening a full editing project, importing the clip into a timeline, and exporting just the audio track — a lot of setup for a task that’s fundamentally a one-step conversion. Extracting audio from video with a dedicated online tool skips that entirely: upload, pick a bitrate, download, without ever touching a timeline or project file.
The tradeoff runs the other way for anyone who needs to trim, fade, or otherwise edit the audio before it’s final — an editor gives you that control, while a straight extraction tool hands back the full, unedited track. For the common case of just needing the sound as-is, skipping the editor is the faster path; for anything needing actual audio editing afterward, extracting first and then opening the result in a dedicated audio editor is usually more practical than doing everything inside a video timeline.
Real Reasons People Pull Audio Out of a Video File
People extract audio from video for a handful of genuinely common reasons. Podcasters often need just the spoken segment from a recorded video call rather than the whole file. Someone prepping a transcription usually gets faster, cheaper results with an audio-only upload than a full video, since transcription services typically bill or perform based on the audio track alone. Musicians and content creators sometimes need to isolate a background track from a video for reuse elsewhere, and turning a favorite line or sound clip into a ringtone only ever needed the audio in the first place.
What Actually Happens to the Video Data During Extraction
Extracting audio doesn’t touch or re-encode the video track at all — the tool reads the container file (MP4, MOV, or WEBM all wrap audio and video as separate streams inside one file), pulls out only the audio stream, and discards the rest. This is why the process is fast even for a fairly large video file: it’s not re-rendering any visual frames, just isolating and converting the audio stream that was already sitting inside the container alongside the video.
This also explains why the resulting MP3’s quality has nothing to do with the video’s resolution — a 4K video and a 480p video with the same underlying audio track will extract to identical-sounding MP3s at the same bitrate, since video resolution and audio quality are stored and processed completely independently of each other inside the file.
When 320 kbps Isn’t Actually Necessary
It’s tempting to always pick the highest bitrate “just in case,” but 320 kbps produces meaningfully larger files for content where the difference is inaudible — a phone-recorded voice memo or a webinar recording won’t sound noticeably better at 320 kbps than at 128 kbps, since the source audio itself doesn’t contain the kind of detail that a higher bitrate preserves. Matching the bitrate to what’s actually worth preserving, rather than defaulting to the maximum every time, keeps file sizes reasonable without any real quality tradeoff for spoken-word content.
Explore More Free Tools on ToolFlexy
- Video to GIF Converter — turn a short highlight from the same video into a shareable GIF.
- Word Counter — check length before pasting a transcript generated from the extracted audio.
Conclusion
When all you actually need is the sound, uploading a full video into an editor and waiting on an export is unnecessary work for what’s fundamentally a one-step conversion. ToolFlexy’s audio extractor pulls the real audio track from MP4, MOV, and WEBM files, lets you pick the bitrate that actually matches what’s in the recording, and hands back a clean MP3 in under a minute for a typical clip — no editor, no timeline, no project file required.